HFH
DuraCirc: how to change the gearbox elastomer kit
401 views
View transcript
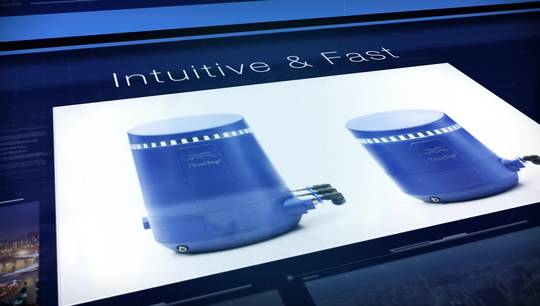
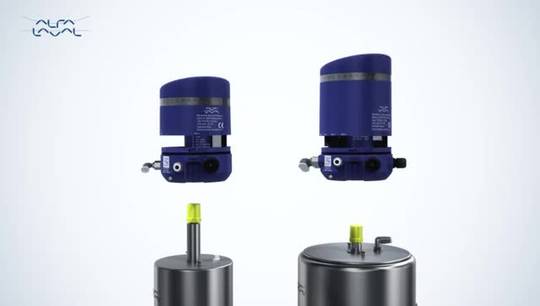
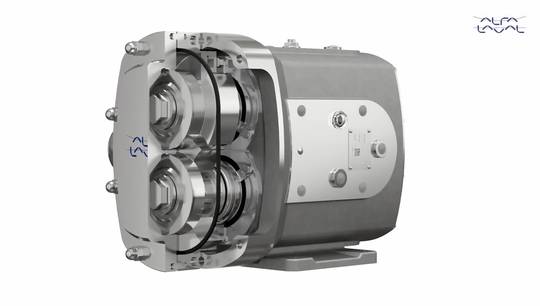
Welcome to one of our Alfa Laval 360° service and maintenance videos. With Alfa Laval service, you maximize the reliability and uptime of your equipment. In this video, we will focus on how to conduct service and maintenance on the Alfa Laval DuraCirc Pump using our tools and service kit with genuine Alfa Laval spare parts. How to change the Gearbox Elastomer kit. First, mark the orientation of the front cover. Remove the rotor case cover nuts and cover. Remove the front cover P-ring. Now, mark the positions of the rotors. Insert a plastic block between the two rotors to prevent them from turning. Remove the rotor nuts. Make sure the rotors are perpendicular to each other. First, remove the rotor that has both wings exposed. Now, remove the other rotor. Remove the rotor nut P-rings. Then, remove the rotor shaft O- rings. Extract the rotary seal face and square ring from the rotors. Use a small tool and pass it through the holes in the front of the rotor to aid removal without damaging the rotor or the seal. Remove the squad rings from the static seal faces. Remove the static seal face and squad ring from the static assemblies. Remove the static assemblies from the rotor case. Next, remove the rotor case retaining screws. Remove rotor case. Tapping both sides with a soft mallet if required. How to disassemble the gearbox. Make sure the gearbox is emptied for oil. If needed, place a tray under the gearcase to collect the waste lubricating oil. Remove the lower drain plug at the bottom of the gear case. Now, remove the gland guard screws. Then remove the gland guards and the seal retainers. Remove the lip seals and seal retainer O-rings. It is essential to replace the lip seals and O-rings prior to reassembly. Remove the screws on the cover. Tap the cover to help break the gasket seal. Then remove the gear case cover. Now remove the lip seal from the cover. It is essential to replace the lip seal prior to reassembly. Remove the seal retainers and press new lip seals into the seal retainers. Apply a small amount of lubricant to a new O-ring then fit it into the seal retainer. Then apply a small amount of gearbox oil to the inner lip of the lip seal and push the seal retainers into position. Make sure the lip seals are not damaged when sliding them onto the shafts. Position the gland guards and tighten the screws. Remove all gasket material from both mating faces on the gearbox cover. And wipe mating faces clean with a solvent. Clean the bore of the gearcase cover and press a new lip seal into the cover until flush. Apply a liquid gasket to the face of the cover where it mates with a gear case. Apply a small amount of gearbox oil on the inner lip of the lip seal and carefully slide the cover over the shaft, ensuring the lip seal is centered and not cut or damaged. Secure with the gearbox cover screws and tighten. Refit any blanking plugs removed during the disassembly. Checking the O- rings are not damaged and replacing them as required. Refill with the recommended oil as according to the instruction manual. Check the pump for any signs of oil leakage and rectify as required. Make sure the shim retainers are correctly fitted to the rotor case and that the shim retain screws do not project beyond the shim retainer. Refit the rotor case to the gear case according to its original orientation as marked during disassembly. Then refit and tighten the rotor case screws. How to assemble the single shaft seal? Align the mark on the front face of the stationary assembly with the lugs in the bore of the rotor case. Press back keeping the drive ring square to the ball until fully engaged. Check that the static assemblies are fully seated by checking the dimensions stated in the instruction manual. Lubricate the squad rings and fit them to the static seal faces, ensuring the lip of the elastomer is towards the seal. The coloured mark should be facing away from the static seal face. Align the slots in the static seal faces with the pins in the static assembly and press back gently until fully engaged. Wipe clean the stationary seal faces with solvent. Lightly lubricate and fit the new rotor shaft O-rings. Lubricate the square ring elastomer and fit it onto the rotary seal face. The coloured dot should be turned away from the rotary seal face. Align the cut-out on the rotary seal with the pins in the bore of the rotor and press back gently until fully seated. Wipe clean the rotary seal faces with solvent. Refit the rotors aligning the missing spline in the rotor with the shafts. Reposition the rotors using the marks made during disassembly when refitting existing components. Lubricate and fit a new P-ring elastomer to the rotor case. Ensuring the coloured mark faces towards the rotor case and is fully seated in the groove. Lightly lubricate and fit the new P-ring elastomer into the groove on the rotor nuts, ensuring the correct orientation. Fit the rotor nuts and tighten them to the required torque as stated in the instruction manual. Use a plastic block to stop the rotors from turning during tightening. To check that the rotors are correctly synchronized, turn the drive shaft by hand and check all clearances with a suitable gauge to make sure they meet the recommended clearance figures as stated in the instruction manual. Finally, fit the cover of the rotor case onto rotor case and tighten the nuts on the rotor case cover. Apply torque as stated in the instruction manual. To maintain the Alfa Laval DuraCirc pump, these tools are required. Always remember to read the instruction manual thoroughly to make sure you cover all maintenance steps. This video only shows you some of the steps. When servicing Alfa Laval equipment, always wear appropriate personal protective equipment. Thank you for watching.